The idea of mail merge is simple & powerful. Imagine you handle recruitment at a large company. You just hired 300 analysts for the big data division. The next job – generate employment offer letters for each of them. Of course, you don’t want to type these letters one at a time. You have the details of all the 300 offers (name, email, address, offer code, role, benefit package details and date of joining etc.) in a spreadsheet. You also have a template of the offer letter.
Enter mail merge. This powerful feature combines MS Word documents with (Excel) data to generate all the 300 letters in just few minutes.
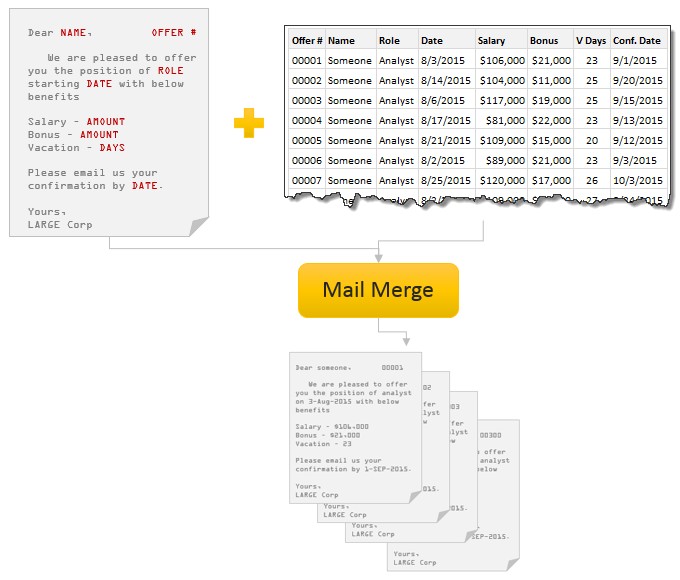
You can use mail merge in many similar situations – like generating invoices, address labels, certificates etc.
Read the below tutorial to learn how to set up mail merge in Word.
Tutorial – using mail merge to generate invoices
For this tutorial, let’s pick the example of generating invoices.
Step 1 – Create a workbook with your data
Let’s say your invoice has 11 fields, as shown below.
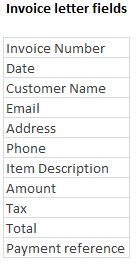
Create a workbook with 11 columns and load data as shown below.

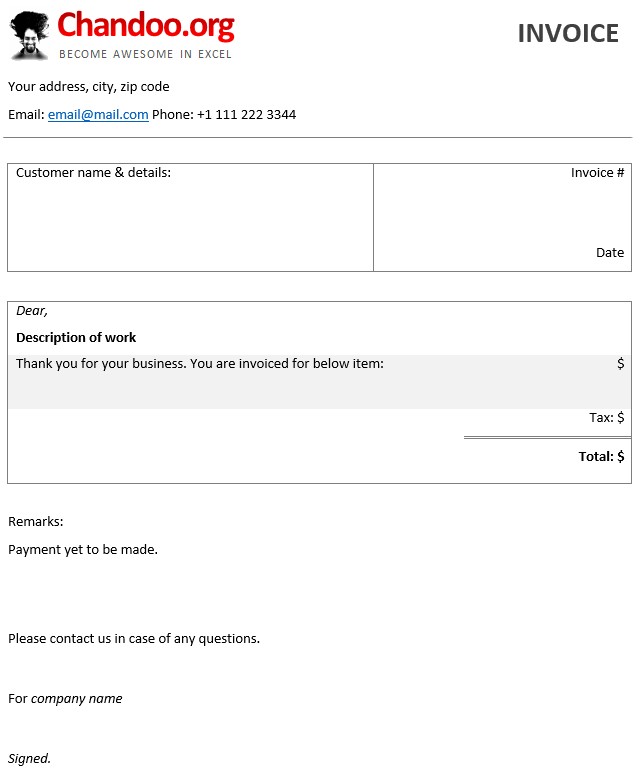
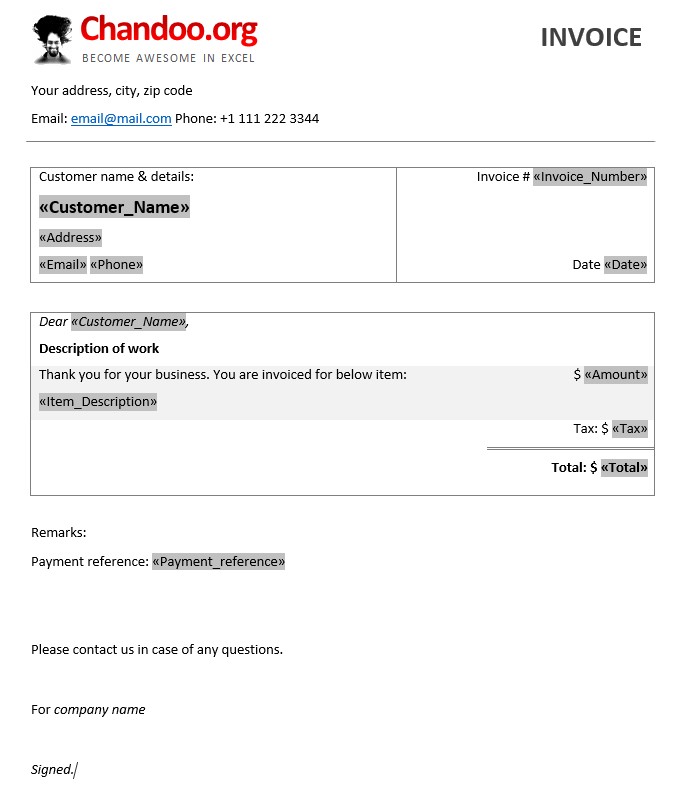
Step 2 – Create an invoice template in MS Word
Open a new document in MS Word and create a document structure that reflects your invoice. You may download the invoice template for inspiration.
At this stage, our invoice looks like this:
Step 3 – Activate Mail Merge
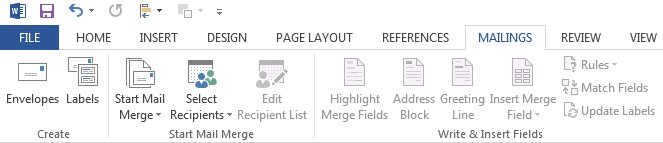
Go to Mailings ribbon in MS Word and click on “Start mail merge” button. Choose the document type that best describes what you are doing (for invoices, you can choose either letter or normal word document)
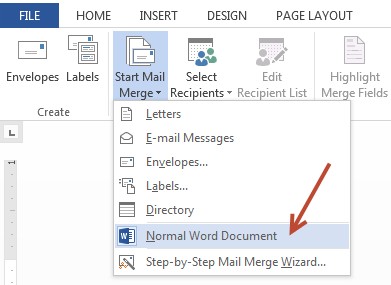
This activates mail merge mode on your document.
Step 4 – Load data
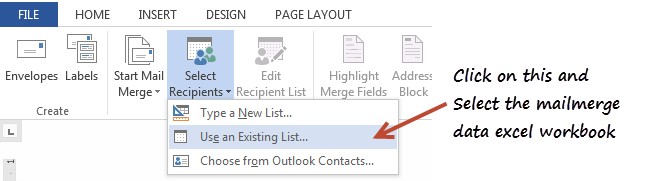
Now, we need to load the field data. Click on “Select recipients” and choose “Use an existing list”. This opens File>Open dialog. Navigate to the folder where you saved Excel workbook with invoice data and select the file.
Step 5 – Insert fields at right places
Now that we have a list of fields, load them at necessary location in the invoice template using the “Insert Merge Field” button.
Pro tip: You can use Rules option to set up If then rules based on field values. (for example, if the payment reference # is empty, you can show different text)
At this stage, our invoice looks like this:
Step 6 – Preview & complete mail merge
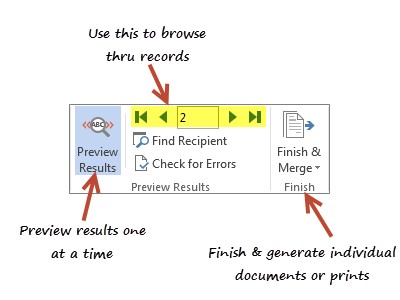
Using the preview results area, check if everything is ok. Once you are ready, click on “Finish & Merge” to generate individual word documents or emails or prints of the invoices.
Pro tip: If you have a PDF printer, you can use that to generate PDFs for each invoice automatically.
Download Mail Merge tutorial files
There are 2 files in this tutorial – Excel workbook with invoice data & Word document with mail merge setup.
After downloading the files:
- Place them in the same folder.
- Open the Word document.
- At this point, you should get an error. Click ok.
- This will open Data link properties dialog.
- Type the full path of the downloaded Excel workbook in the Data source field. Click ok (see image).
- This should establish the connection for you.
Do you mail merge?
Mail merge is a very powerful and time saving feature. I use it often when I need to generate a lot of documents in one go.
What about you? Do you use mail merge? Please share your experiences & tips in the comments section.
Other ways to generate documents in Excel
- Generate Word reports from Excel
- Mr. Hui’s awesome Excel report printer
- Make power point slides from Excel data & charts
- Generating invoices & quotations in Excel – free template
- Send emails using Excel & Outlook


